

Hermannsdalstinden is the highest peak on Moskenesoya island in Lofoten, hence many visitors to the archipelago set their eyes on this majestic mountain, and so did we. A hiking trip to Hermannsdalstinden isn’t an easy day out thou, quite the opposite – conquering the summit involves a rather long approach, climbing an airy ridge and negotiating a boulder field, not to mention climbing massive, smooth rocks at the very top. Its top offers spectacular views over ‘yttersia’, the most dramatic part of Lofotodden National Park.
Hermannsdalstinden is a challenging hike, but it’s just as rewarding with the 360 degrees panoramic views over the western part of Lofoten. On a clear day you can see as far as Leknes & Uttakleiv area! The ocean below seems to be without end, and quite often is covered by clouds, lazily stretching its soft blanket, reaching to the northern shores of Moskenesoya.
Although it’s possible to complete the hike to Hermannsdalstinden Lofoten during one day, it would be a very long and exhausting walk, therefore we opted to split it over 2 days, camping overnight near Munkebu hut.
Continue reading to find out how to tackle Hermannsdalstinden hike and how to turn a strenuous challenge into an amazing 2 day adventure in Lofoten’s wilderness!
Hermannsdalstinden hike – at the rooftop of Moskenesoya in Lofoten
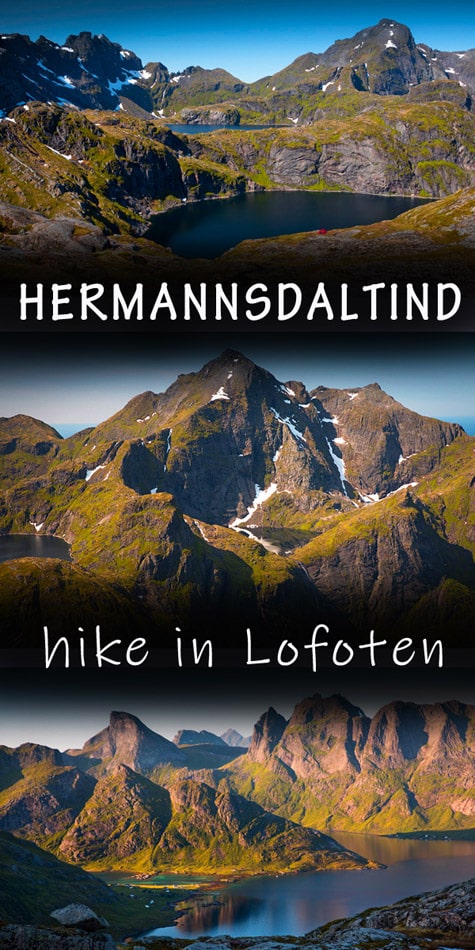
- Height: 1029 masl
- Total time from Munkebu hut: 7 hours (12-13 hours from car park in Sorvagen)
- Total distance from Munkebu hut: 12 km (23 km from car park in Sorvagen)
- Total elevation gain from Munkebu hut: 1184 m (approx 1800 metres from car park in Sorvagen)
- Parking: car park in Sorvagen (directions), charge applies (50 NOK per day, paid cash – summer 2019)
- Level of difficulty: 4/5 – long and challenging hill walk, involves scrambling, some steep and exposed sections
- Hermannsdaltinden weather: weather forecast for Hermannsdaltinden
How to get to Hermannsdalstinden trail head
There are two ways of climbing Hermannsdalstinden.
The first one involves taking a boat from Reine to Forsfjorden (timetable), then climbing an extremely steep and very eroded slope, following electric line posts till the saddle between two minor hills, marked on the map as ‘448’ and ‘536’. The route runs thru wet terrain and involves up to 6 stream crossings. Despite this being the shorter option, it definitely is more difficult and involves taking a boat, which in summer is extremely busy (its main destination are trailheads to Bunes and Horseid beach). Also, this route omits a beautiful approach to Munkebu hut, which we believe is worth the effort! The hut itself is spectacularly located amongst Lofoten’s high peaks. Therefore, despite shortly describing it for you, we don’t recommend conquering Hermannsdalstinden this way.
We believe that Hermannsdalstinden is best approached from Sorvagen, via Munkebu hut. There is a dedicated hiker’s car park in the heart of Sorvagen village (directions), signposted from the main road. The car park was upgraded and extended, toilets built in summer 2019, however a 50 NOK per day charge was introduced (paid cash to an ‘honesty box’).
From the car park follow the marked trail to Munkebu hut (signposted and marked with red dots and ‘T’s) for approximately 5.5 km (2-2,5 hours).
We have hiked to Munkebu hut on two occasions and prepared a separate, detailed blog post describing the route and our experience (in wet weather and in dry weather!).
Once at Munkebu hut, we followed a small path, which was only partially marked, but relatively easy to follow, all the way to Hermannsdalstinden (detailed route description and map below).


Hike to Hermannsdalstinden Lofoten
Weather forecast for the following two days looked so good that we couldn’t ignore it and decided to stay overnight in the mountains. 15C during the night! Wow! This was almost unreal – as we still remembered our previous visit to Munkebu hut in August 2018 when we could only dream about 15C during the day! Hence, we were extremely happy to experience the proper summer conditions while hiking Hermannsdaltind Lofoten!
We had our eyes on two mountains – Hermannsdalstinden and nearby Munken. We planned to conquer both, with overnight wild camping just below Munkebu hut. I am very glad we did it. These were fantastic two days and a great experience of wilderness in Lofoten’s mountains, and the ‘cherry on the cake’ was the midnight sun! Simply magical!

How to hike Hermannsdalstinden (and why not add Munken?!) – the ultimate 2 day adventure in Lofoten’s wilderness – 3 options
Very often hikers make Munkebu hut their base when heading for Hermannsdalstinden or Munken, and we believe it’s the best plan!
However, below, we’re listing all 3 options for conquering Hermannsdalstinden:
Option 1: hike Hermannsdalstinden in one day. Such hike is hardly possible within a single day (approx. 12-14 hours, distance 23 km, elevation gain 1800 metres), especially if attempted outside summer (short days). Nonetheless, even for a very fit person it would be a very long and hard day out!
Option 2: reach Munkebu hut in the afternoon, conquer Munken for sunset and the next day set off to Hermannsdalstinden which is still 6 km (4 hours) further, return to Sorvagen on the day 2 evening, or stay at Munkebu hut again and return on day 3.
Option 3: hike to Munkebu hut in the morning, set up a camp nearby and head to Hermannsdalstinden summit with lighter bag. Return to Munkebu hut (or your camp), where you can stay overnight and the next day head to Munken, return to Sorvagen in the evening.
We believe that OPTION 3 is the smartest way of conquering Hermannsdalstinden and we’re describing it below!

As we planned to split the hike to Hermannsdaltinden over two days, with overnight stay in Munkebu hut area, we arrived to the hut just after mid-day with intention to have a well-deserved break, lunch and to set up the tent before climbing to the roof of the Moskenesoya. This allowed us to leave all camping gear and take only day packs with water, snacks, warm clothes and of course the camera 🙂
During the break we also spent some time working out our route, which actually was quite simple when we looked towards the peak from Munkebu hut.

Before we move further to the Hermannsdaltinden route description, please keep in mind these important points:
- Take plenty of water with you – the only place to fill up water between Munkebu hut and Hermannsdaltinden is Krokvatnet lake (also marked as source of drinking water, hence no polluting please!). We can confirm it’s OK to drink water from this lake – we did it without adding any purifying tablets and didn’t experience any stomach problems.
- It is a long and strenuous hike to Hermannsdaltinden, ensure to be prepared for it! The distance is around 12 km (return) from Munkebu hut and the weather can change dramatically within a blink!
- we hiked to Hermannsdaltinden on a dry summer day; the experience will greatly differ from ours when the weather is wet, or when hiking in spring/autumn/winter (snow & ice)

The trail to Hermannsdaltinden is only partially marked, but it’s easy to follow all the way up to the top.
From Munkebu hut continue down to the saddle between Tennesvatnet and Fjerddnasvatnet lakes. It’s an easy, downhill path. From the saddle continue up the rugged trail, over the boulders and towards the rock wall of Moltinden, then turn right – the path will gently descent to another saddle. At this point you should cross under the electricity lines which run along Krokvatnet lake. Remember, Krokvatnet is the last opportunity to fill up your bottle with drinking water! We did drink it without adding any tablets and were absolutely fine – the water was very clean (the lake is marked as ‘drinking water’). The gentle hill-bumps along Krokvatnet are also nice place to have a quick snack, as from there on, the path only gets harder.

As we mentioned earlier, we had really good weather conditions, also it hadn’t rained for few days before either, hence the path was not very muddy. We can imagine that in wet weather, or after the rain, walking conditions may be much worse – please bear that in mind!
But, let’s continue… Having passed the hill-bumps along lake Krokvatnet, we walked towards a bit higher ground (on the map it’s a nameless hill marked 448 metres height) then down again, to the low point near lake Krokvatnet. Worth a mention is descent from this little hill – it’s not difficult to navigate and quite clear where to go, but this section is steep and can definitely be tricky when wet. During our hike, however, we didn’t have much of the problem as the ground was mostly dry.
Good news was, that we didn’t have to climb to the top of the next hill along the way – the rugged, rocky bump we could see from ‘hill 448’; as the path by-passed its highest point. Instead, we followed a narrow and slightly exposed path (again be careful when wet!) till reaching the flatter area, with small ponds. That was another perfect spot for a short break, before starting the next section of Hermannsdalstinden hike – climbing the rocky and steep ridge.

This section is probably the most challenging, but actually it was really nice to have a bit of a challenge and excitement along the way and we greatly enjoyed it. There were several chains and ropes fitted and we used them to support at the most difficult parts, but even Bea, who is mildly afraid of heights enjoyed climbing it! Top section of ridge has no support and required us to use both hands to get up, but again it was a rather nice short scramble without being too technical. However, keep in mind, that typically for Lofoten – this section gets very muddy and slippery when wet; that could add to its difficulty and actually be dangerous.
The scramble ended at a wide, grassy plateau, but the Hermannsdalstinden’s top still seemed far away; and in fact, it is still over 350 meters of ascent away.

Ela greatly enjoyed this short, grassy section, she said that having nice soft ground underfoot again was a pleasure! But soon we faced the next stage of Hermannsdalstinden hike – the steady climb over well defined path towards large rocks and boulders. Some hikers just head straight thru boulder field towards the summit, but we took the path running up the grassy slopes (a bit to the left); this was much easier climb.
Soon, the navigation got trickier, the path got steeper and fainter, but we looked for footprints and crushed rocks, and spotted traces of path where people walked over whatever felt easier to cross.
Just below the summit we came face to face with massive boulders and decided to follow faint red dots painted on the rocks and cairns. They were relatively easy to spot and seemed to take us up through fairly uncomplicated terrain, but still we had to cross many eroded sections with loose stones and scree.
We got a bit impatient as this stage; you know the feeling when you are so close, but at the same time it still costs you so much effort to get to the top, and it seems still so far away!

When we reached Hermannsdalstinden top, it was 7pm, and we only met few groups coming down. This meant we had a peak just to ourselves… at least for some time.
The summit was a bit awkward and definitely not the best place to sit and relax, so having explored it a bit, we made ourselves comfortable sitting at the flat rocks just below.
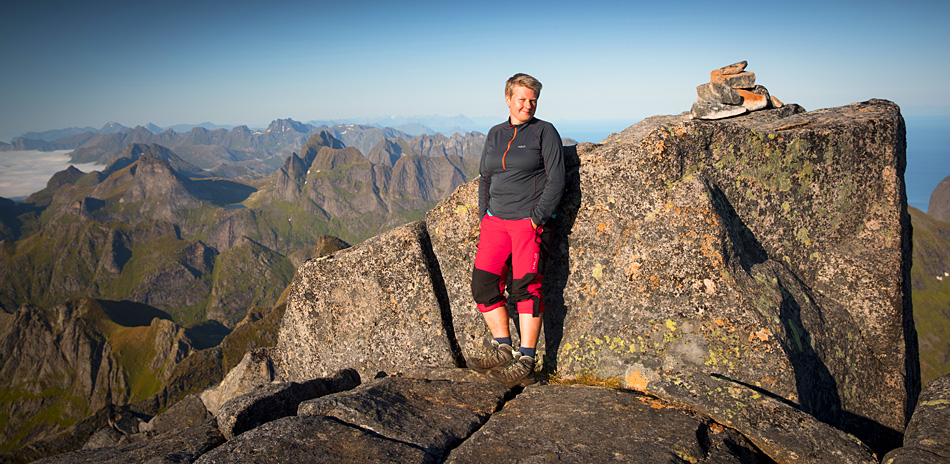

It was a calm and enjoyable evening, and after 4 hours of constant ascent, we did make sure to take our time at the top!
The views were phenomenal, as we were above everything on Moskenesoya island. And all we saw around were endless fjords and peaks of Lofoten islands. Our views towards ocean to the north were a bit obscured by incoming clouds, but who would ever mind having an inversion!

We really enjoyed our time at the top and couldn’t be happier – we conquered the peak, which just few hours ago seemed totally impossible to climb! One only can feel respect while looking at mountains like Hermannsdalstind from the distance…

Unhurriedly, we took last look at the beauty around us and decided it was time to descent; ahead of us were about 3 hours of walk. We made it back to the tent at 11pm.

Walking back to Munkebu hut was not all easy, because the path went up and down a lot… there were still few ascents and some of the terrain required the same or even more attention while descending. But the sun never got down (summer in the far north is amazing for that!), so we didn’t have to worry about time. We could, however, feel in our legs that we have been walking ‘for a while’ already…

It took us approximately 7 hours (with some small breaks) to climb Hermannsdalstinden and get back down to Munkebu hut, plus 1 hour break at the top (we started around 3pm and got back to the tent around 11pm)
We thought it would be possible to continue down to Sorvagen (if necessary), but we wanted to stay overnight in the mountains and conquer Munken next morning (you can read all about it in the ‘Munkebu hut’ post), hence we quickly refreshed ourselves, had a very late dinner and got to bed.


Hermannsdalstinden Lofoten – hiking map

Wild Camping along the way to Hermannsdalstinden, and the nearest campsite
Finding a good spot to stay overnight off grid is generally difficult in Lofoten. In most suitable spots camping is forbidden. By general rule, in Norway, wild camping is only allowed 150 metres from nearby dwellings, however on many occasions we found notices put by the locals that they do not wish campers to stay overnight on their land.
There is a very good spot for wild camping with a camper van or a motorhome near Sorvagen village. It is a large free car park at the very end of the road, in village Å. There is a toilet available and for such large car park it is relatively quiet. Located at the western end of Moskenesoya island it’s only 5 km from Moskenes! Finding a decent spot to wild camp with a tent is a bit trickier as the lower ground in Lofoten is generally very wet. Grounds near car park in Å are not suitable and camping is forbidden, the same applies to Sorvagen area. One can try to find a bit drier spot on higher grounds but this could be a challenge too. Also please note that camping in tent at Munkebu hut is forbidden, however if you walk a bit further from the hut (and drinking water) you can find a couple of suitable spots. Please, however, keep in mind that the lakes and streams near Munkebu hut are source of drinking water, and behave respectfully, don’t pollute it.
There were numerous suitable camping spots on the way to Munkebu hut and further along the trail from Munkebu hut to Hermannsdalstinden (if you wish to carry all camping gear with you!) – the best were along Krokvatnet, on ‘hill 448’ and then further on the grassy plateau below the summit.
There are two campsites near Moskenes/Sorvagen although in my opinion they’re overpriced. Moskenes Camping located near ferry harbour has good and clean facilities and a pub/bar, but virtually no WiFi. A night stay with a small camper set us back 320 NOK (340 NOK with electricity) which we thought was a bit of a rip off. There is also a campsite in village Å, but we’re unable to comment on its facilities and price.

What we loved about hiking to Hermannsdalstinden in Lofoten
Definitely we can recommend splitting the hike over two days – for us the fact of spending the night in some of the wildest areas of Lofoten greatly added to the experience. We just loved it! Yes, we do appreciate summer over arctic circle – it’s a special time of endless daylight and freedom to hike till we drop dead, basically; without being limited by nightfall. Hiking to Hermannsdalstinden was a challenging but very rewarding adventure, one can never have enough of spectacular summit views, warm light and connection with nature. Would we do it again? Oh yes, and we would definitely do it the same way!
LOOKING FOR OTHER AMAZING HIKES AND BEACH WALKS IN LOFOTEN?
If you’re looking for other hiking ideas on Lofoten archipelago, check out these amazing hill and beach walks! All include detailed route descriptions and maps:
VEGGEN – a short, but steep hike to an amazing viewpoint over Uttakleiv and Haukland beach. You may be lucky to spot the pair of eagles nesting in Veggen’s crags!
KVALVIKA BEACH AND RYTEN – why not combine conquering Ryten with a visit to Lofoten’s gem beach – Kvalvika? A great, rewarding hike in Lofoten’s wild mountains.
ROREN AND YTTERSAND BEACH – short and easy hike to Roren, a viewpoint over calm waters of Flakstadoya and Yttersand Beach. Why not enjoy eagle-eye view first, and then descend to the picturesque sandy beach?
FLOYA AND DJEVELPORTEN – a great, challenging hike to Djevelporten boulder and stunning viewpoint along Floya ridge, over the town and islands of Svolvaer.
MATMORA – a fine ridge walk off the main Lofoten route, at the top of Austvagoya island. Enjoy stunning views and few fellow hikers
*Level of difficulty explained: 1– easy walk, mostly flat 2– easy hillwalk, good path 3-moderate, possible some steep sections 4-long hillwalk, possibly some scrambling involved, possibly pathless 5-difficult, possibly pathless, long, requires technical skills
NORWEGIAN DIFFICULTY LEVEL EXPLAINED: GREEN – easy , BLUE -moderate, RED – demanding, BLACK -expert
