


Svolvær is one of the largest towns on Lofoten, but its stunning location makes it a perfect outdoor gateway! Being located on-shore as well as on small islands and framed by majestic peaks, the unique town of Svolvaer is especially beautiful when seen from above! No wonder, that the hiking trails over the town get very busy with walkers hungry for stunning views! The best hike to get the eagle-eye view of Svolvær is Fløya and Djevelporten!
The Fløya and Djevelporten duo are incredibly popular; despite being rather steep and strenuous they’re the top choice when it comes to best mountain hikes near Svolvaer!
Most walkers venture to Fløya and Djevelporten without giving much thought to the other stunning mountains in the area. However, we were quite keen to extend the hike and include another 2 peaks in the route. That’s how we ended up with the ‘3 peaks over Svolvaer’ challenge; hiking to Fløya and Djevelporten as well as Blåtinden (the highest mountain in the area!) and Tuva.
In this article we share how to hike to Fløya and Djevelporten over Svolvær, and how to extend the hike into a fantastic full day adventure!
Hike to Fløya and Djevelporten, Blåtinden and Tuva

- Height: Floya 590 masl, Blatinden 625 masl, Tuva 477 masl, Djevelporten 450 masl
- Total time: 3 -4 hours to Fløya and Djevelporten only (8 hours – adding Blatinden and Tuva)
- Total distance: 5.5 km to Fløya and Djevelporten only (12 km – adding Blatinden and Tuva)
- Parking: no dedicated car park, however numerous parking spaces in the residential area near trail head, or car park at the nearby church (directions) IMPORTANT NOTE Google Maps can show the wrong way to the trailhead, it may erroneously take you via pavement (see here) Follow THIS MAP to the trail head (red dots).
- Level of difficulty: 4/5 – relatively difficult hill walk, steep throughout. Initial section involves scrambling over large boulders and use of ropes. Norwegian standards: BLUE – moderate
- Floya weather: weather forecast for Svolvaer
How to get to Fløya and Djevelporten trail head
Fløya and Djevelporten trailhead is conveniently located in very close proximity of Svolvaer town centre. Therefore, if you’re based in the town, we simply recommend walking to the trailhead, rather than driving.
As mentioned in the ‘fact sheet’, Google Maps ‘thinks’ that you can access the church car park directly from the main road E10, however this is an error. Also, keep in mind that, despite being mentioned on several other websites, you are not allowed to park your vehicle on the Svolvær kindergarten car park, it is now clearly prohibited and your car will be towed away (2019).
Trailhead to Fløya Lofoten hike is located at the road corner, directly past the kindergarten, signposted with two small signs.


Hiking trail to Djevelporten and Fløya Lofoten
The most difficult part of Fløya Lofoten hike is the initial section.
Once you hit the trail, you’ll instantly come across large boulders obscuring your way. Unfortunately, there’s no way around them and you’ll have to find your way of climbing over them. In my case it proved to be tricky, as I am quite short and struggled to reach handholds. Finally I managed with a bit of help from fellow walkers. And it wasn’t just me struggling along this section; there were numerous other hikers unsure how to progress.
Having passed the large boulders you may think that the challenge is over, but in fact, what comes next is just as demanding, as the boulders give way to large smooth rock slabs and mud. Mind you, the trail is still very steep and requires a lot of care!

Luckily, as soon as you leave the bushy woodland behind, the challenging section is over, and the views finally open! That’s the first opportunity to take photos of Svolvær’s tranquil surroundings, with countless lakes and high mountains! It’s also a perfect time to have a break, if you need your heart-rate to settle down.
With the most difficult part of the hike already past you, you can now focus on the day’s destinations: Floya and Djevelporten.

Look out to your right, towards the sharp tower of Solvaergeita. Sadly, this viewpoint is accessible only for experienced climbers; we could only imagine how awesome it feels to top such a pinnacle! If you feel strongly excited about climbing it, you can arrange a local guide to take you up.
Djevelporten boulder is located in the saddle along the mountain ridge, directly in front of you. It is however, totally invisible from any other point than the saddle itself, so don’t worry if you can’t spot it. Ensure to follow the muddy path straight ahead; you’ll have to jump over a couple of mud-dips, but as the inclination eases, you’ll pass this section in a heartbeat.

Take great care further up, the zig-zaging path taking you directly to the saddle at Djevelporten is steep (again!) and eroded. However, all your efforts will be rewarded once you reach the saddle and set your eyes on Djevelporten boulder!
Prepare yourself to wait a couple of minutes before daring to step on the boulder, thou. This spot gets extremely busy as everyone wants to give it a try, but eventually not everyone dares, which can cause queues and delays. It’s a ‘hot spot’, very similar to Kjeragbolten in Western Norway.
Although many visitors hike to Djevelporten only, we strongly recommend continuing to Floya’s ridge (at least!) which is the best viewpoint over Svolvaer’s islands.
How does it feel to stand on Djevelsporten boulder?
First of all, it’s not as scary as it seems! In fact, what you don’t know before actually stepping on it, the boulder hangs only several metres over the ground. So, there’s no abyss under your feet! But I do agree, from the saddle it looks rather scary!
Secondly, despite its appearance, the Djevelporten slab is relatively wide and flat. Looking at the photographs you only see its front, but there’s more space to stand on. And, most importantly, the slab is solid, does not move; and when I stood on it, I didn’t feel I was in much danger.
Last thoughts about Djevelporten boulder:
- photos don’t always reflect the very true situation or circumstances, often they appear more dramatic than ‘real life’. I mean, look at the photo of me standing on Djevelporten boulder, it DOES look really scary; a narrow rock loosely hanging over the abyss! (which is not exactly true)
- HOWEVER, if you’re struggling with fear of heights, you’ll probably want to skip the Djevelporten challenge. You can still hike to the saddle thou, and see the boulder; this is not scary at all!

Next point on day’s agenda is hiking to Fløya. It’s approximately 20 mins walk from Djevelporten, but we found it quite steep (yet again!)
Summit of Fløya is a rocky spike, reaching it requires good head for heights and good hand-on-rock skill. However, to enjoy the stunning views over Svolvær town and the islands, you don’t have to desperately push yourself to the very top!
If you don’t feel comfortable scrambling to the summit of Floya, which is somewhat exposed, you can follow the ridge and come to a viewpoint at its end. To be honest, view from the ridge end is probably what you’re looking for anyway; at least is provides an undisturbed, spectacular panorama. Whereas, view from the summit is slightly obscured by the ridge, so don’t be upset if you don’t tick off the top of Floya!

If you planned a hike to Djevelporten and Floya only, your journey is over. Carefully retrace your steps to the car park.
If you’re a seasoned hiker, you may want to follow our footsteps and challenge yourself to the highest mountain in Svolvær area, Blåtinden. Further in this article we’re sharing detailed route description and our experience of conquering additional 2 mountains, before returning to the car park.

Extend the hike to Fløya and Djevelporten! Conquer Blåtinden and Tuva!
Having previously had a close look at the hiking map, we were quite keen to extend the walking adventure over Svolvær. Although the Norwegian hiking map we used reflected path to Blåtinden only vaguely, we were supported by Maps.me and ViewRanger Android applications. Maps.me and ViewRanger not only reflected the exact paths but also our location. Therefore it was really easy to follow the faint trails, which otherwise we would struggle to find! We do recommend downloading the two apps!
Despite being very basic (Maps.me doesn’t show terrain – only location and paths; whereas Viewranger is slower to work, but reflects location, paths, terrain and contours) they’re very useful and helped us on numerous occasions; and most-importantly they work off-line!

From Floya, descend to the path junction under Djevelporten and continue ahead towards the grassy slopes of Blatinden. The trail is narrow and faint, but once you’re actually on it, you’ll be able to follow it without much problem. Also, the path is marked; look out for BLUE markings on rocks.
Soon you’ll come to a boulder with a small cairn (pile of stone) built on it (and marked blue!). This is where you should leave the main path and start the steep hike climb to Blatinden.
We completed the hike in summer; the path was hardly visible because of the overgrown grass and flowers. We still managed to spot the blue markings ‘here and there’ and follow the trail OK. The abundance of herbs and flowers actually added to the experience – air smelled of summer, so nice!
You’re most likely to only be able to see the path directly under your feet, and no further, so let us quickly tell you which way it winds to Blatinden.

At first, hiking trail to Blatinden zig-zags over lower, overgrown slopes, however as you get higher the flowers thin out. The path then turns slightly right towards the grassy ridge and a grand viewpoint, before turning sharply left and taking you towards rocks and boulders of Blatinden summit area.
Final 10 minutes of the climb will leave you breathless, it’s a very steep grassy gully, which abruptly ends and suddenly you’re at the summit!

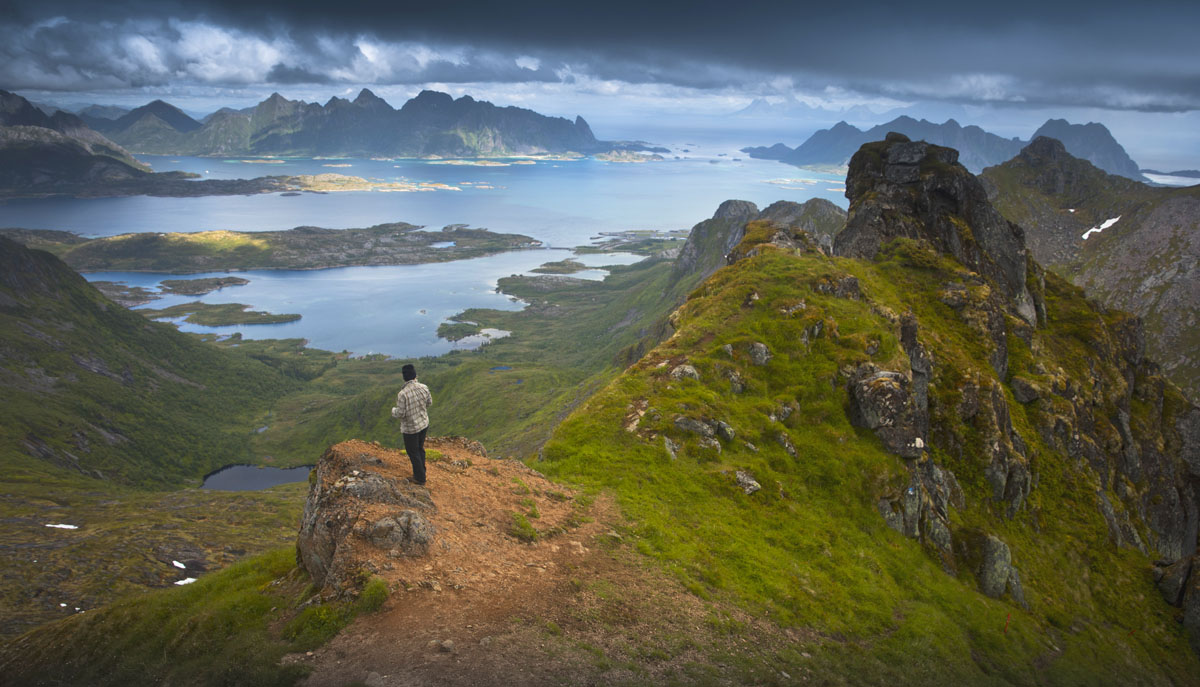
I hope the above photo will convince you that climbing Blåtinden is well worth the time and effort!
With a bit of luck and weather gods being on your side, the panorama from summit of Blåtinden will leave you speechless! Dramatic mountain tops, labyrinth of islands, lakes, far islands; all these come together and make the well deserved reward for the strenuous hike!
Eye familiar with Lofoten’s landscapes and landmarks will immediately spot Henningvaer archipelago, Litlmolla and Skrova islands, mountainous islands of Steigen, as well as countless peaks of Austvagoya. Simply stunning!
If you’re ready to move on to the last peak of the day, Tuva, follow the trail towards the northern ridge of Blatinden.
Despite the ridge itself looking rather inviting, we though that following its very top may be too challenging. Instead took the well trodden path descending from Blatinden to lower grounds and running on the left side of the ridge; all the way to the paths junction, between lake Blatindvatnet and Tuva.

Getting to Tuva was quick and easy, apart from one spot where, again, I struggled to climb pass the boulder because my legs were too short!
Nonetheless, when I finally topped Tuva, I loved the view and felt that adding this last, small mountain to the day’s itinerary was a great idea! Surprisingly, Tuva offers a totally different perspective than the other two mountains, Blatinden and Floya. It is much lower, however, we felt that the scenery was somehow ‘closer to us’ and we thoroughly enjoyed it.

Returning to the car park from Tuva
I think that some could find the return walk from Tuva to the car park quite tricky navigation-wise, therefore I’ll describe it in detail.
Return to the paths junction below Tuva and turn right; follow the red-marked trail all the way to lake Gronnasvatnet. Continue along lake’s northern and western shore, ignoring the fork to the right. Soon you will walk in the open space, over gentle ‘bumps’ of smooth rock slabs acting as your walkway. Follow these rock ribs for about 200 metres and look out for a path forking to the left (don’t go towards the houses).
After you turn left, the path runs over northern shores of Gardsosen and briefly enters the woodland. Some 10-15 mins later the trail emerges to Knutvika beach.
Walk towards the houses at the other end of the beach and follow the paved road thru residential area, all the way to the car park (approximately 1 km further).
We felt that the descent from Tuva to Knutvika dragged and was longer than we anticipated, however don’t let the long way down discourage you from including Blatinden and Tuva in your itinerary.
Fløya and Djevelporten, Blåtinden and Tuva hiking map

Wild camping near Fløya and Djevelporten, Blatinden and Tuva; and the nearest campsite
Unfortunately, as the trail starts in the heart of a residential area, staying overnight near the trailhead is not an option. In fact, there aren’t many suitable overnight stay spots near Svolvaer.
The nearest, decent car park is located over Austnesfjorden and despite being described as ‘rest place’, many make it their overnight spot.
If you’re travelling with a tent, bad news is that there aren’t any suitable pitching spots on lower grounds near trailhead; due to the steepness of the terrain along the route, the best place to stay overnight is Tuva / Blatindvatnet area as well as Gronnasvatnet.
During our visit to Svolvaer area, we stayed at the campsite near Kabelvag, which was reasonably priced and well looked after. In fact we returned to the very same campsite on further occasion! We do highly recommend it, however it gets busy in summer and advanced booking is advisable!
What we loved about hiking to Fløya, Djevelporten, Blåtinden and Tuva over Svolvær in Lofoten
We loved the trail from the very beginning, despite struggling at times (short legs and large boulders don’t go together very well!). Daring myself to step on Djevelporten boulder was a fine experience with a bit of adrenaline rush, view from Floya blew us away! We especially enjoyed the fact that hike was easy to extend, and including Blatinden and Tuva in the itinerary greatly added to the experience! We’re sure to revisit the 3 peaks as soon as we return to Lofoten!
LOOKING FOR OTHER AMAZING ADVENTURES IN LOFOTEN?
If you’re looking for other hiking ideas on Lofoten archipelago, check out these amazing hill and beach walks! All include detailed route descriptions and maps:
VEGGEN – a short, but steep hike to an amazing viewpoint over Uttakleiv and Haukland beach. You may be lucky to spot the pair of eagles nesting in Veggen’s crags!
HERMANNSDALSTINDEN – conquer the highest summit of Moskenesoya island on the western end of Lofoten archipelago! An amazing, 2 day hike thru stunning wild mountains!
TINDSTINDEN– a fine hike to the peak over village A, starting from Sorvagen. A surprisingly adventurous half-day hike with spectacular views!
MUNKEBU HUT – explore wilderness of Moskenesoya island in the western part of Lofoten archipelago. The hut is located amongst high rocky mountains and makes a perfect day hike, or a great base to explore Munken and further summits.
VAEROY ISLAND – day trip to a small island off Lofoten’s western end. Vaeroy is easily explored on foot or by bike, offers great short hikes as well as a fine local cuisine!
*Level of difficulty explained: 1– easy walk, mostly flat 2– easy hillwalk, good path 3-moderate, possible some steep sections 4-long hillwalk, possibly some scrambling involved, possibly pathless 5-difficult, possibly pathless, long, requires technical skills
NORWEGIAN DIFFICULTY LEVEL EXPLAINED: GREEN – easy , BLUE -moderate, RED – demanding, BLACK -expert
