
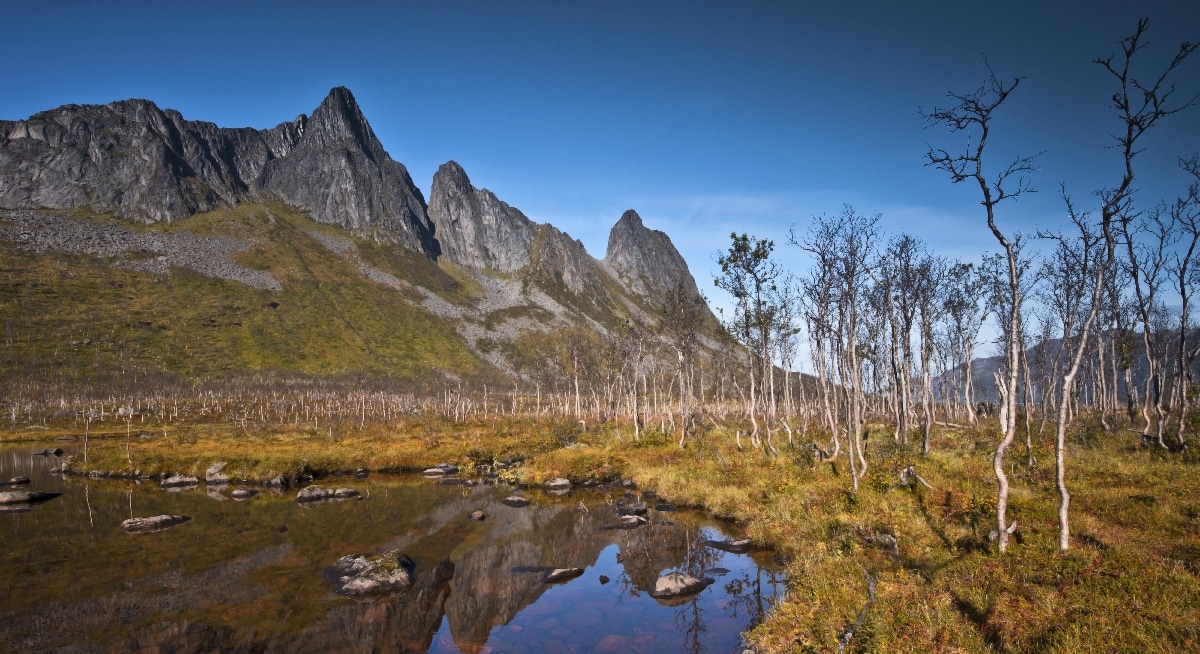
Inste Kongen is one of the hardest hikes on Senja in Norway, suitable for experienced walkers only.
During the exploration of Senja, Inste Kongen caught our eye on couple of occasions. We were especially mesmerised looking at its sharp rocky peak from Hesten; illuminated by sunset, the dramatic ridge looked equally magical and ominous! However, we struggled to find information about this hike. Yes, we knew it was a long and hard day out, this much we easily concluded by analysing the map. But knowing that there’s no path past Hesten ridge, we searched for route descriptions, without success.
Based on our own struggle to find sufficient information about the hike and route map, and also being approached by readers with questions about the hike to Inste Kongen, we decided to share our experience.
We believe this will help many of you to decide whether you should consider conquering Inste Kongen, or skip it and admire it from afar instead.
The sole purpose of this article is to give you first-hand information about the hike to Inste Kongen Senja. We will not try to convince you to push your limits, but provide detailed info about the difficulties you may come across and what you can expect during the hike. We hope you’ll find it helpful! Once again, let me emphasise that Inste Kongen hike is suitable for experienced walkers only! To tackle this mountain you have to be comfortable with exposure, skilled navigator and a confident hiker (very likely you won’t meet another soul).
Hike to Inste Kongen Senja

- Height: Inste Kongen 738 masl
- Total time: 8-10 hours
- Total distance: approximately 14 km
- Parking: parking bay at Hesten trailhead (directions)
- Level of difficulty: 5/5 – difficult and long hike with tricky navigation; very steep, mostly pathless. Summit area very exposed.
- Total elevation gain: approximately 1400 metres
- Inste Kongen weather: weather forecast for Inste Kongen
Our experience hiking to Inste Kongen Senja
There are two possible routes to Inste Kongen, both initiating in Fjordgard. Option one starts at Purkenesvika and steeply climbs to the saddle under Bjornskarkollen, then descents just as steeply to Korkedalen valley. Keep in mind that despite being slightly shorter, this route is pathless throughout, also it descends to the wetter part of Korkedalen and you’d have to cross a very swampy ground, cut by a stream. We opted for another route, which is a bit longer, but easier. We conveniently broke it into sections and describe them in detail, below. We also indicate approximate timings for each stage, which were significantly greater going to Inste Kongen then on the return way, due to tricky navigation and route finding (on the way back we simply retraced our steps).
Stage 1: Fjordgard to Hesten ridge (1 – 1.5 hours)
This is the easiest section! Initially, we followed a hiking trail to Hesten, the famous viewpoint to Segla. Once we reached the saddle between Hesten and Stavelitippen, we faced a wild pathless terrain. Also, at this point we first saw the mighty Inste Kongen, its sharp ridge and rocky summit towering above Korkedalen.

Stage 2: Descent from Hesten ridge to lake Korkedalsvatnet and approach to the saddle under Svartevasstind (1.5 – 2 hours)
We were relieved to find a faint path descending to the other side of Hesten ridge, and we tried to follow it. But very soon we realised that we couldn’t rely on it, as it kept disappearing. Therefore we decided to follow a rib, a long bump on the slopes, which was leading us directly to the eastern end of lake Korkedalsvatnet. We kept to the right side of the rib, sometimes we came across small paths, but we didn’t pay too much attention to them.
Once we descended to Korkedalen, we continued along the lake, past the little stream and came across a make-shift camping spot. Unfortunately, we were quite shocked to find discarded pans and unusable pots around! I mean, what an asshole would leave all this rubbish in such a remote, wild place?!
Korkedalen is beautiful, being surrounded by mountains which reflected in still water of Korkedalsvatnet. We really liked the view, but at the same time we felt quite anxious, so we set off without delay.
We didn’t even find any traces of path in the valley, so we directed the steps straight towards the steep slopes under Inste Kongen and to Svartesstind. Only when we stumbled upon a bog pit or a mini-lake, stream or swampy ground, we adjusted the direction, but ensured we’re not by-passing more than necessary.
Important note: Area near the lake is the driest part of Korkesdalen, hence we recommend taking this route.
Stage 3: Climbing to the saddle at Svartesstind (1 hour)
This ascent is extremely steep, and you’re likely to hold on to vegetation for support, or, like me, end up going 4×4 from time to time. The only piece of advice I can offer on this section is ‘try to keep to the left side’. We found this particular climb very hard and, to be completely honest, I hated it. I really did dislike this section, disliked it with passion.
Prepare yourself for climbing a steep slope covered by loose rocks, which escape from under your feet. I lost balance more than once. I slide down. I searched for better route up all across the way, but there’re wasn’t any. I can swear I spotted traces of path, but none of them improved the experience. Eventually I climbed up sticking to the transition areas between loose rocks and vegetation, these were fairly stable.

Stage 4: From the saddle at Svartesstind to western ridge of Inste Kongen (1.5 hours)
It was a great relief to finally climb to the saddle, despite finding out that its top is covered by boulders, which we had to negotiate. But, what was the most uplifting, we finally had some views to ‘the other side’, and these were spectacular!
We discovered a fairy-tale land with wild inaccessible mountains and pristine lakes. However, I started feeling a little bit overwhelmed by the whole experience. I can say that the hike cost me more mentally than physically.
How to continue the hike from the saddle: we descended a couple of metres to the other side of the saddle and spotted traces of path, or walked-on vegetation. But very soon they vanished.

The greatest challenge of this section is to identify where to head, at what exact point to meet the Inste Kongen western ridge. It took us ages to decide on the exact point, and still we weren’t 100% sure it was the one.
So, to recap, the terrain is pathless. We also found it quite tricky to cross, as once again we faced unstable rocks, boulders as well as smooth rock slabs covered by green slimy primitive vegetation, which were very slippery! Other places were covered by inviting thick soft moss, but hiding holes underneath. We had to be very careful and watch every step.
Also, there is a mini-cliff when you come nearer Inste Kongen ridge, we by-passed it ‘over’, rather than ‘under’, extremely careful not to slip on steep, wet ground.


Stage 5: final climb to the summit of Inste Kongen (20-30min)
Having reached the western ridge of Inste Kongen, we turned left towards the summit. Conquering the sharp top involves scrambling, which we found just a tad too exposed, and we gave up on the last couple of metres. We did enjoy the amazing views from a bit lower down and it was just as fine, I believe.
We looked for Kongeporten, the ‘stone bridge’ on the southern side of Inste Kongen, relaxed and rested before heading back. Let’s have a look at these mind-blowing summit views then, shall we?


Too aware of the amount of time we took to reach Inste Kongen, we retraced our steps back to the saddle (1 hour), down the extra-steep slopes of Svartevasstind (1 hour, just as tricky going down as it was going up), thru Korkedalen valley (40 mins), up to Hesten ridge (45 mins) and back to the car (40 mins).
Final thoughts about Inste Kongen hike
Undoubtedly, view from Inste Kongen was amongst the best we experienced on Senja, also it was the wildest part of the island we explored. However, I found the hike incredibly challenging mentally; without sufficient information I struggled to identify the route, I was excessively aware of the amount of time I ‘wasted’ trying to decide which way we should go. Final stages of the hike were challenging, I also felt disheartened by giving up just before the summit. It took me about a year to finally be able to look at Inste Kongen with fresh eyes, rather that thru its hardship. I am tempted to say, I would return to Inste Kongen to tackle the summit again, and would love to spend more time exploring this remote area.
There’s another thing I just realised I haven’t mentioned yet. It seems that this part of Senja island is notorious for low clouds coming from the ocean and covering basically everything apart from mountain tops. This occurred on our way back, Korkedalen almost completely disappeared in mist and when we reached bottom of the valley, the visibility dropped drastically. Be aware that the low clouds make navigation thru Korkedalen tricky.
On a positive note, on our way back we witnessed the most stunning sunset! Just as we topped the Hesten ridge, we realised that a thick blanket of clouds is closing over fjords. We approached the cliff edge below Hesten and saw this:


I would love to say that I immediately forgot all the pain and struggle of the day, but I did not… I was very close thou!
Inste Kongen hiking map


IF YOU FEEL THAT CONQUERING INSTE KONGEN IS TOO MUCH, CHECK OUT THESE STUNNING HIKES ON SENJA!
BARDEN – located near Fjordgard, is locals’ favourite hike. The trail follows a mountain ridge directly over two beautiful fjords.
KEIPEN AND GRYTETIPPEN – a challenging hike to two majestic, rocky peaks. The views to Senja’s mountain ridges and blue waters of Ornfjorden will make you speechless. Well worth the effort!
HUSFJELLET – an easy hike to Husfjell, iconic mountain over beautiful Bergsfjorden, Senja’s only fjord dotted with dozen of small islands. Hiking for sunset or midnight sun highly recommended!
Campsites near Fjordgard and wild camping along the way to Inste Kongen
Unfortunately, there aren’t many campsites in northern and western Senja. The only one in the area is Fjordbotn Camping (website) located in Indergard, 15 km away from Fjordgard.
Wild camping is allowed and widely accepted in Norway. By law, everyone is allowed to stay overnight at any spot at least 150 metres from nearby buildings. That means that you shouldn’t stay overnight at the parking bay at Hesten trailhead, nor at school car park below Segla.
Finding a good spot to pitch a tent along Inste Kongen would be tricky, as lower parts are rather wet and higher up the terrain is too steep. I can think of two very good wild camping spots along the way: at the lake Korkedalsvatnet, and on the spacious western ridge of Inste Kongen.
A heavenly answer to wild camping in Fjordgard & generous heart of local community
At the end of the road in Fjordgard is Purkenesvika – an idyllic outdoor area with benches, barbecue hut and a toilet. There is also space for few tents and a couple of cars or caravans. It’s a fantastic place to ‘stay wild’ while visiting Fjordgard (in exchange for a donation), but please be respectful. Local community is amazing, generous and very welcoming. They look after Purkenesvika and visit it on regular basis. Purkenesvika is also perfect for fishing, but you need to have your own fishing rod (fishing in ‘open waters’ is allowed without licence). Drinking water can be filled up at the village shop (hose with fresh water is fixed at the shop left side).
We stayed at Purkenesvika for about a week in total, by far it was the best local community experience in Norway. During the stay, we saw elders coming for their daily walk to the beach, parents with kids enjoying the Sunday sunshine. As ‘wild campers’ we were greeted and treated very friendly. What was even more amazing, local school allowed hikers to use their facilities (toilet and shower!) when the kids were out. I really wanted to mention this, because it touched me to see such responsible and generous community. You know, the trails near Fjordgard were the cleanest ever, we didn’t see any rubbish, toilet paper nor ‘human waste’ at all. And I believe this was mostly due to the fact, that local community recognised the increasing need for ‘tourist infrastructure’, and, as there’s none, they allowed to use school’s facilities and Purkenesvika.
Majority of visitors at Fjordgard were respectful, but with time we noticed that some campers used the toilet to leave their rubbish… because they didn’t bother to walk 100 metres to the large rubbish container provided. What a shame!
Please note that there is a large rubbish container along the road between Purkenesvika and Fjordgard village. DO NOT LEAVE YOUR RUBBISH IN THE TOILET! Do not expect anyone to clean after you! If you’re not a respectful guest, the local generosity may end… that would really be a shame.
Staying at Purkenesvika was a pleasure, a real highlight of our Norwegian adventure. We both left a piece of our hearts at the road end in Fjordgard… on the day we left Fjordgard for good, we shed some tears…
If there’re no spaces available at Purkenesvika you can try the two parking areas at the entrance to first Fjordgard tunnel from main road no 862 (directions).
*Level of difficulty explained: 1– easy walk, mostly flat 2– easy hillwalk, good path 3-moderate, possible some steep sections 4-long hillwalk, possibly some scrambling involved, possibly pathless 5-difficult, possibly pathless, long, requires technical skills
NORWEGIAN DIFFICULTY LEVEL EXPLAINED: GREEN – easy , BLUE -moderate, RED – demanding, BLACK -expert
